
A spoiler-light starter guide for Deadly Days: Roadtrip: first survivor, fuel timing, level-up picks, base spending, and the mistakes that end runs.
Deadly Days Roadtrip Beginner Guide: First Runs Done Right
The first hour of Deadly Days: Roadtrip is deliberately overloaded. A tutorial hands you a pistol, a small backpack, and a bus, then drops you into a stop full of loot with no obvious order of operations. This guide is the order of operations. It assumes you have played the tutorial and want the first three runs to end because of a decision you can learn from, not because you did not know a rule.
Official source: Deadly Days: Roadtrip store page
More sources: Pixelsplit — Deadly Days: Roadtrip and Steam news hub.
Choose the plain survivor first
The default survivor starts with a pistol and a normal backpack. That is not boring; it is the cleanest way to learn the grid. Character items on the exotic survivors change the rules before you understand the rules — the Vampire starts with no weapon at all, and Penny's balloon asks you to manage a timer you have not met yet.
Play the default for one full run, ideally to the first boss. Then pick a character whose item you understand. The characters guide explains each playstyle without ranking them.
Your first stop: loot in a route, not in a circle
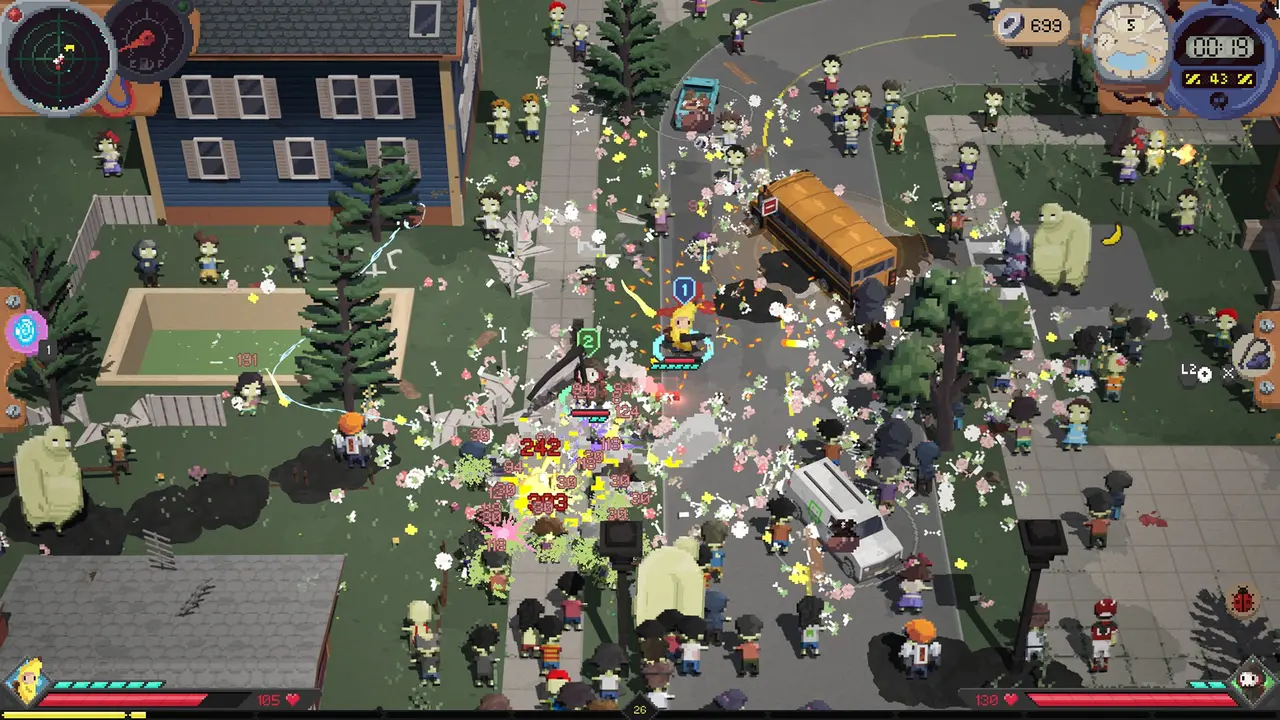
Every map is a cluster of loot spots connected by roads. New players walk to the nearest shiny thing, then the next nearest, and finish in the middle of the map with a full bag and no fuel.
Instead:
- Open the map and find the fuel icons first.
- Draw a rough line that touches two or three fuel spots and the shops on the way.
- Loot buildings on that line, not off it.
- Leave the far corner alone unless the map modifier makes it worth the walk.
Fuel is the only resource that lets you leave. Loot is worthless if the bus cannot move. The maps guide covers icons and events in detail.
Take the boring level-up
On level-up you get item choices and a free airdrop. The tempting pick is always the flashy legendary you cannot fit. The correct pick in the first two days is usually:
- a weapon that covers a range you lack;
- a support item that fits beside an existing weapon;
- a backpack expansion, if one is offered;
- scrap, if you are two coins short of a shop item you actually need.
A legendary in the stash is not a build. A rare pistol with three neighbours buffing it is a build. This is the single largest skill jump in the game, and the backpack guide is the long version.
Leaving one or two empty cells lets you pick up a quest item, a merge duplicate, or a shop purchase without destroying your layout. A perfectly packed bag is a bag that cannot grow.
Spend your first apples on tempo, not cosmetics
Base progression uses apples, and unlock currency uses duct tape. Early on, the upgrades that pay back fastest are the ones that touch every run:
- extra backpack columns or bag space;
- more rerolls or better level-up choices;
- movement or loot speed;
- a fourth item slot in the airdrop.
Cosmetic stickers and character costumes are fine later. They do not help you survive the second boss. The duct tape guide lists what each unlock costs and what to buy first.
Learn the day/night rhythm
A stage has a day phase and a night phase. During the day you can loot with modest pressure. At night the horde thickens, special enemies appear, and the map becomes a different place. Two rules follow:
- Do not start a long loot animation at dusk. You will be interrupted.
- Do not shop at night unless the shop is on your exit road. The detour costs more than the item saves.
If you are still on the map around the twelve-minute mark, expect the reaper. That is not a metaphor. It is a hunter that appears when you overstay, and it is covered in the death unlock guide.
Fight with space, not with bravery
Combat in this game is positioning plus item triggers. You are not dodging a bullet-hell pattern with frame-perfect inputs; you are keeping a lane open and letting your backpack do the work. Three habits:
- Kite in a loop, not in a straight line. A straight retreat ends at a wall.
- Use the dash to cross damage, not to travel. Dash is your escape from a surround.
- Kill the thing that spawns, not the thing that is closest. Runners and ranged enemies punish stationary looting.
If a fight is going badly, the correct play is to leave the loot and walk to the bus. There is no penalty for extracting early beyond the loot you did not take.
Your first boss: learn the phase, not the damage
The first boss is a check on whether your build has a plan. Every boss has a phase change, and most wipe new players in the second phase, when the arena fills with hazards and the boss adds a movement pattern.
- Keep one dash for the phase transition.
- Do not stand in the corner; bosses with jumps and tackles punish it.
- Damage over time effects keep working while you reposition, so apply them before you move.
The boss guide has per-boss tells. If you die, note which attack killed you; that is the attack to watch on the next attempt.
Mistakes that end first runs
- Buying a weapon with no space for it. Check the grid before you pay.
- Skipping fuel to chase a crate. The crate is not worth a night wave.
- Hoarding merge duplicates in the stash. Merge them; a higher rarity beats two rares.
- Ignoring adjacency. A buff item in an empty corner is half an item.
- Spending all scrap on healing. Healing is cheap; tempo is not.
- Fighting the reaper. You can, eventually. Not on run two.
What to read next
- Backpack guide for the grid rules.
- Crafting guide for merges and recipes.
- Extraction guide for the leave/stay decision.
- Best builds once you have a favourite weapon.
- Tips and tricks for the settings and systems the tutorial skips.
FAQ
Should I finish every map? No. Finish the fuel gauge and leave when the next fight costs more than the loot is worth. Overstaying is the most common cause of a lost run.
Is co-op harder? Enemy count scales, but two backpacks and cross-backpack synergies are a large advantage. It is different, not strictly harder.
Can I respec? There is no respec. Items can be sold, merged, or banished from the loot pool; base upgrades are permanent.
Do I lose everything on death? You keep meta currency and unlocks. The run's items and scrap are gone.
Related
More Deadly Days: Roadtrip Guides
Every Deadly Days: Roadtrip boss explained: Franky, Ballerina, Dumpling, Blob Ball, Mr. Kyde, Laz and the HQ CEO, with phase tells and build counters.
Deadly Days: Roadtrip survivors ranked for a first clear: default, Bushy, Carver, Penny, Vampire, Santa, Surfer, and the secret Reaper.
Every confirmed Deadly Days: Roadtrip survivor, their signature item, playstyle and unlock route, from the Vampire to the Carver and the secret Reaper.
Deadly Days: Roadtrip codes checked for the 1.0 build: how to redeem, which strings are confirmed, which are community reports, and the scams to avoid.
What duct tape unlocks in Deadly Days: Roadtrip, the reliable sources (bosses, reaper, achievements), and the order worth spending it in.
How Endless Mode scales in Deadly Days: Roadtrip, which builds survive the curve, and the item priorities that stop a finished run from falling over.
A working list of Deadly Days: Roadtrip items: support, trigger, mobility, sustain, cursed merchant goods and character items, with what each one does.
How legendary loot works in Deadly Days: Roadtrip: rarity, merging, glowing crates, the radar, boss drops, and the fastest ways to farm high-rarity gear.